This post may contain affiliate links. Please read our disclosure policy.

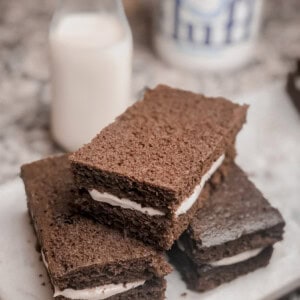
I absolutely love remaking popular food and desserts and this Hostess Suzy Q’s Copycat Recipe is no exception. I was so excited when I saw these back on the store shelves! There are tons of recipes out there for the Ding Dongs and Hostess Cupcake, but this is less popular counterpart that is just as amazing and it’s the perfect little cake sandwich. I hope you love making this as much as I did!
Remember when Hostess went bankrupt and we thought we would never be able to taste a Twinkie again? (clutching my pearls!) Well sadly for me and some others out there, the Suzy Q’s disappeared around that ~2012 time period and were never revived 🙁
They tried bringing them back in 2016, but with LESS cream filling. People were so angry and after hundreds of low reviews on Amazon, Hostess removed them off the shelves yet again! Oh the games they played with my heart, I tell you.
Fast forward to nowadays, these have a permanent place on the store shelves (for now) and they are pretty similar to how I remember them.
As a backup plan, I have created a homemade copycat version of the Hostess Suzy Q’s in case there are more dark days ahead haha.
Looking for other Hostess and Snack Cake Copycat Recipes?
The Best Hostess Cupcake Copycat Recipe
Entenmann’s Devli’s Food Cake Donuts Copycat Recipe
Brownie Stuffed Chocolate Chip Cookies
Special tools recommended for this recipe:
There are a few items I wanted to point out that will be very helpful in making this recipe. These items could be replaced with other items you may already have in your cupboard, but this is what I found easiest:
1) Two 9×13 sheet pans, like these: Wilton Easy Layers Sheet Cake Pan, 2-Piece Set
2) Offset spatula: Cake Decorating Angled Icing Spatula Set of 6 8 & 10 Inch Wooden Handle Stainless Steel Offset Frosting Spatulas
3) Cooking twine or unflavored dental floss: Regency Natural Cooking Twine 1/2 Cone 100% Cotton 500ft
Is there a different between Jet-Puffed Marshmallow Creme and Marshmallow Fluff?
Key differences between Jet Puffed Marshmallow Creme vs. Marshmallow Fluff:
Yes, there IS a difference between marshmallow fluff and marshmallow creme. Although they have both been tested and work equally well for this recipe, marshmallow fluff is the original invention and is sort of the “Kleenex” while jet-puffed marshmallow creme is the “generic tissue”. The Fluffernutter sandwich can ONLY be made with Marshmallow Fluff, according to no source other than myself.
Seriously though, Fluff is better in all ways. It has a totally different texture and is more, well, FLUFFY and whipped whereas the Jet-Puffed Marshmallow Creme’s texture is more liquid as it contains water.
Fluff contains zero water but has dried egg whites instead, yielding a firmer, stretchier, stickier, almost taffy-like texture.
Marshmallow Creme tastes a lot like a smooth, fluid version of the Jet-Puffed Marshmallows.
Where to find Marshmallow Fluff?
I am located in the Southeast, so thankfully it’s available on most grocery store shelves. But if you are not able to find it locally, I highly recommend you grab a container or two on Amazon and try it out for yourself. As mentioned above, there is a huge difference between the two.


I look forward to your questions and feedback below. Please be sure to tag me @BadBatchBaking using hashtag #badbatchbaking if you may this recipe and I will feature you on my story!
Hostess Suzy Q's Copycat Recipe
Equipment
- Cooking twine or unflavored dental floss
- Offset spatula
- Half sheet pan or cookie sheet w/ 1" edge
Ingredients
Cream Filling
- 1 stick salted butter, room temp 1/2 cup
- 2 cups marshmallow fluff or marshmallow creme
- 1 - 1/2 cups powdered sugar
- splash milk or heavy cream
- 1/2 tsp vanilla extract
Chocolate Cake
- 2 cups all-purpose flour
- 2 cups granulated sugar
- 1 cup cocoa powder
- 2 tsp baking powder
- 1 tsp salt
- 2 tsp instant espresso powder
- 1 cup milk
- 1/2 cup vegetable oil
- 2 eggs
- 1 cup water (lightly boiled) if you don't have instant espresso powder, you can use ot coffee on this step
Instructions
Chocolate Cake
- Preheat oven to 325º F. Grease 2 cookie sheets or half sheet pans with at least a 1" lip (17 1/4" x 12 1/4" x 1")
- Add flour, sugar, cocoa, baking powder, baking soda, and salt to a large bowl of a stand mixer. Using paddle attachment, stir through flour mixture until combined well.
- Add milk, vegetable oil and eggs to flour mixture and mix together on medium speed until well combined. In a microwave safe glass, heat water until boiled. Remove from microwave and add espresso powder and mix well. With mixer on low speed, carefully add boiling espresso water to the cake batter. Increase to high speed for about 1 minute to add air to the batter, scraping the bottom to ensure it's fully incorporated.
- Evenly distribute cake batter onto prepared sheet pans, coming about half way up the pans. Bake in the oven until a toothpick inserted in the center comes out clean, about 20 minutes. Remove from the oven and allow the cakes to cool completely. Turn onto cooling racks to completely cool before frosting.
Cream Filling
- Add butter to a mixing bow and beat with hand mixer on medium speed, add the marshmallow fluff and beat together until super soft and airy. Reduce the speed to low and carefully add the 1 cup of powdered sugar, slowly, followed by the milk or cream. Beat on low until it has all been incorporated. Increase the speed to medium-high and beat for an additional 1 to 2 minutes, or until very light and fluffy. Adding a tad more powdered sugar if texture is too runny.
Assembly
- Cut the sheet cake in half length wise, so you have two long pieces, about 6" wide. Brush off any excess crumbs. Lay the two long pieces side by side onto a clean surface and spread an even layer of cream filling onto one side of the cake. Top with the matching side, creating one long sandwich. Repeat with the second sheet cake.
- If you have any uneven edges, use a bread knife and trim the edges. Using unflavored dental floss or cooking twine, cut sandwiches about every 2-3 inches by pressing the string down into the cake and pulling the string through the side. It will yield about 6-8 sandwiches or so, per cake.
- I wrapped each cake in cling wrap for individual snacking and packing in lunches, then put them into an air tight container in the fridge.


